



What Are the Four Violin Strings? Names, Order and Pitch
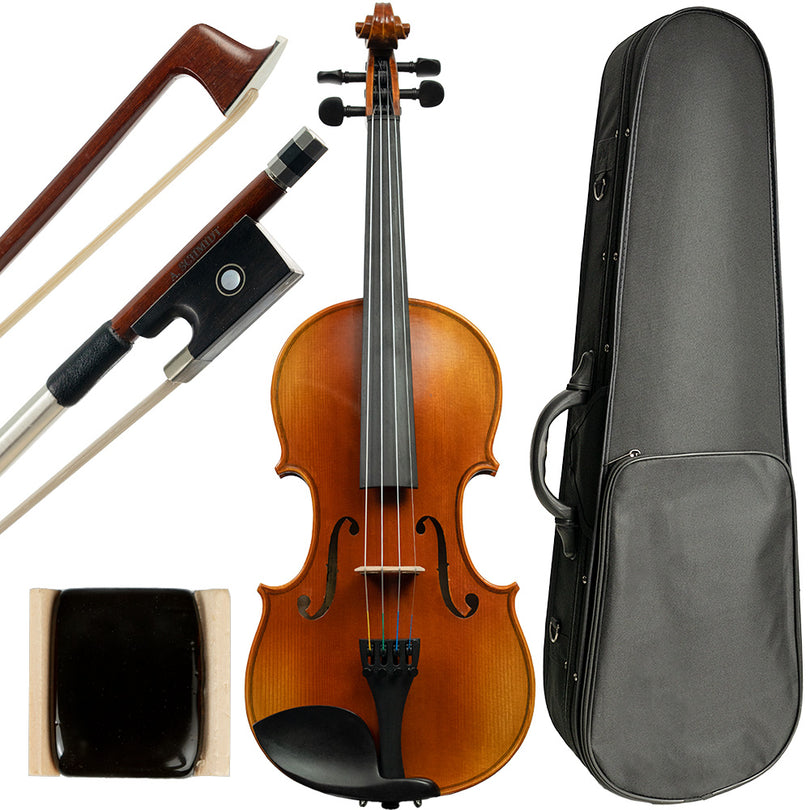
A standard violin has four strings: G, D, A and E, listed from lowest to highest. Adjacent strings are tuned a perfect fifth apart. A fifth spans five letter names when you count both ends, as in G–A–B–C–D. In a front-view diagram with the scroll pointing up, G is on the left and E is on the right.
You will also see the strings numbered in method books and sheet music. The E string is the 1st string and the G string is the 4th string. Roman numerals I through IV can indicate which string to use; finger numbers 1 through 4 indicate the left-hand fingers.
| String | String number | Open-string pitch | Approx. frequency (A4 = 440 Hz, equal temperament) |
|---|---|---|---|
| G | 4th (IV) | G3 | 196.00 Hz |
| D | 3rd (III) | D4 | 293.66 Hz |
| A | 2nd (II) | A4 | 440.00 Hz |
| E | 1st (I) | E5 | 659.26 Hz |
The number after a note name identifies its octave; middle C is C4. The frequencies above are rounded equal-tempered reference values. Tuning pure fifths by ear can produce slightly different readings.
The A string is usually the reference pitch for the instrument. A4 = 440 Hz is a common starting point, but some ensembles use a higher reference such as 442 Hz, so follow your teacher or ensemble. In standard tuning, the open G3 is the violin's lowest note.
To remember the string order from low to high, try the mnemonic Good Dogs Always Eat.
Violin String Notes Chart for First Position
First position is the basic hand position beginners usually learn first. The chart below shows common starting fingerings on all four strings, from G3 on the open G string to B5 with a regular 4th finger on the E string. The 2nd finger has both a low and a high option.
These are useful beginner patterns, rather than a list of every note available in first position. Other notes use a low 1st finger, a raised 3rd finger, or other adjustments and extensions. Some pitches also appear on more than one string.
| String | Open (0) | 1st finger | 2nd finger (low / high) | 3rd finger | 4th finger |
|---|---|---|---|---|---|
| G | G3 | A3 | B♭3 / B3 | C4 | D4 |
| D | D4 | E4 | F4 / F♯4 | G4 | A4 |
| A | A4 | B4 | C5 / C♯5 | D5 | E5 |
| E | E5 | F♯5 | G5 / G♯5 | A5 | B5 |
In the patterns shown here, the 1st finger is a whole step above the open string, and the 3rd and 4th fingers are a whole step apart. Those distances change in other patterns. A whole step leaves more space between the fingertips than a half step; fingers playing a half step are often close together, but your hand size affects whether they touch.
High 2nd finger sits a half step below the 3rd-finger notes in this chart. It gives you B on the G string, F♯ on the D string, C♯ on the A string and G♯ on the E string. For example, D major uses high 2 on the D and A strings.
Low 2nd finger sits a half step above the 1st-finger notes shown here. It gives you B♭, F, C and G natural. For example, G major uses low 2 on the A and E strings. The pattern depends on both the string and the music: D major also needs low 2 on the E string for G natural.
Finger tapes can make these spots easier to find. A teacher can mark the positions needed for your current music and check that they are accurate. The tape shows you where to aim, but listening still matters. As your pitch awareness improves, work with your teacher to remove the tapes gradually.
Open String vs 4th Finger: Which Should You Play?
Look at the chart again and you will notice three matching pairs. A regular 4th finger on the G string plays D4, matching the open D string. On the D string it plays A4, matching the open A; on the A string it plays E5, matching the open E. The E string has no higher neighboring string on a standard four-string violin.
| Feature | Open string | 4th finger |
|---|---|---|
| Tone | Often brighter and more ringing | Often easier to blend with nearby fingered notes |
| Intonation | Depends on the open string being correctly tuned | Depends on both tuning and finger placement |
| Vibrato | No direct fingertip vibrato on the sounding string | Allows left-hand vibrato |
| Bowing | May require a string crossing | Can keep a passage on the same string |
Open strings are useful starting points for playing in tune because you set their pitch when tuning. They also ring freely, which can add brightness to a phrase. A normally bowed open string does not offer the same left-hand vibrato as a fingered note, and its sound can stand out in a smooth melody.
The 4th finger takes coordination and practice, but it lets you stay on the same string and shape the note with vibrato. Neither option is automatically better for fast music: sometimes an open string makes a passage easier, while a 4th finger avoids an awkward string crossing.
Start with the fingering marked in the music or suggested by your teacher, then consider the sound and bowing. For a useful intonation check, compare a regular 4th-finger note on the G, D or A string with the next open string, provided that open string is in tune. Aim to match the pitch and listen for pulsing when the two notes sound together.
How to Memorize the Notes: Mnemonics, Tapes and Daily Drills
Short, regular practice helps connect a note's name, its sound and its place on the fingerboard. These three methods can work together.
1. Start with a mnemonic. “Good Dogs Always Eat” gives you the string order. From there, learn the letter names up each string: on the A string, for example, they are A, B, C, D and E. Then check the key signature and any accidentals to see which notes are sharp, flat or natural. C and C♯ share a letter name, but need different finger placements.
2. Use finger tapes as temporary support. Tapes or a suitable fingerboard guide can help you connect a finger placement with a note. Ask your teacher to place them for the pattern you are learning. Gradually rely more on listening and reading the music, rather than watching your fingers for every note.
3. Try a 5-minute daily drill.
- Say the four open-string names out loud while you pluck them (1 minute).
- Pick one string and a pattern from your current piece or scale. Say each note's full name, including any sharp or flat, then play from open string to 4th finger and back (2 minutes).
- Have a friend, teacher or app call out notes from that pattern for you to find (2 minutes).
Before starting, make sure your open strings are in tune. Our guide on how to tune a violin walks through the process. Use a tuner for occasional checks, confirming the note name as well as the pitch indicator, and practice listening before looking at the display.
Keeping Your Strings Sounding Right: When to Replace Them
Worn strings can lose clarity, respond less evenly or become difficult to tune accurately. That does not mean every old string makes every note flat. Watch for changes such as:
- Fraying, unraveling winding or obvious physical damage
- Persistent dullness or uneven response after normal cleaning and tuning
- A string that no longer plays reliably in tune, after your teacher or luthier has ruled out technique or setup problems
Replace a visibly damaged string promptly. Tuning instability alone is not proof that a string is worn out: new strings need time to settle, and slipping pegs or other setup issues can also cause problems. Discoloration by itself is not a reliable replacement test.
As a rough planning guide, Shar suggests replacing strings every 6 to 12 months for students practicing daily, and every 3 to 6 months for heavier use. These are estimates, not guaranteed lifespans. Some string manufacturers recommend shorter intervals. Follow the guidance for your particular strings and replace them sooner if their condition or sound calls for it; an E string may need separate replacement.
The string's construction also shapes its feel and sound. Steel-core strings often offer a clear, focused response and good tuning stability. Synthetic-core strings offer a range of tonal colors and are a common choice for players at many levels. Gut-core strings are valued for their tonal character but are generally more sensitive to humidity and need more frequent tuning. The exact result depends on the string model and the violin, not just its core material. Many synthetic- and gut-core sets use a steel E string.
If you are changing strings yourself, review our guide to common mistakes when changing strings. Replace only one string at a time, keeping the others in place, and ask a teacher or luthier for help if you are unsure.
Find the Right Strings for Your Violin
Knowing your notes is easier when your strings respond consistently. When it is time for a change, browse our selection of violin strings and match the strings to your instrument and playing needs.
A matched set is a straightforward starting point, but replacing the whole set is not always necessary. An individual string, especially an unwound E, can be replaced separately when appropriate. Replacing worn G, D and A strings together can help keep their response and tonal freshness consistent. Whether replacing one string or a full set, change only one string at a time.
Start by choosing the correct instrument size and string length. Then consider the sound and response you want, with advice from your teacher or a string specialist. For a beginner, a suitable steel- or synthetic-core set can be a practical choice.
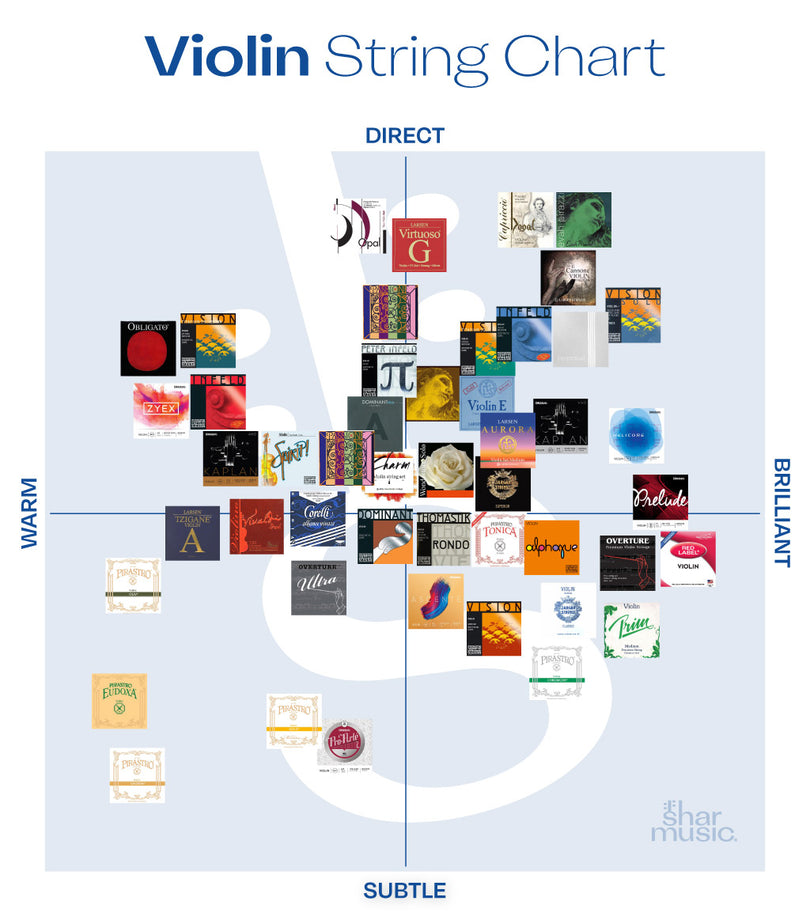
Our Violin String Sound Chart compares the tonal character of popular sets to help you narrow the options. It is a guide to string sound and selection; the first-position fingering chart above shows where to find the notes.
FAQ
How many strings does a violin have?
A standard violin has four strings: G, D, A and E, tuned in perfect fifths from lowest to highest. Five-string violins also exist, but the notes and fingerings in this guide are for a standard four-string violin.
What are the violin strings called, from lowest to highest?
From lowest to highest, the strings are G, D, A and E, with open-string pitches G3, D4, A4 and E5. String numbers run the other way: E is the 1st string (I), A the 2nd (II), D the 3rd (III) and G the 4th (IV).
What notes are on each string of a violin?
In the beginner first-position patterns shown above, the notes are:
- G string: G3, A3, B♭3 or B3, C4 and D4
- D string: D4, E4, F4 or F♯4, G4 and A4
- A string: A4, B4, C5 or C♯5, D5 and E5
- E string: E5, F♯5, G5 or G♯5, A5 and B5
These are common starting patterns. Other finger placements, including a low 1st finger or raised 3rd finger, add more notes without necessarily changing position.
How can I memorize violin notes and strings quickly?
Use a mnemonic such as “Good Dogs Always Eat” for G–D–A–E. Then practice a short daily drill: say each note's name, including any sharp or flat, before playing it. Start with one string and one scale or piece at a time. Use a tuner for occasional checks while training your ear to recognize the pitch.
What is the highest note on the E string in first position?
B5, played with a regular 4th finger, is the highest note in the beginner chart above. It is not an absolute limit of first-position playing: an extended 4th finger can reach C6. Learn the basic pattern first, then work on extensions with your teacher.
Should I use the open string or the 4th finger for the same note?
Follow the marked fingering or your teacher's advice first. An open string gives a bright, ringing sound and may simplify some passages. A 4th finger lets you use left-hand vibrato and can avoid a string crossing. Either can work in fast music; choose according to the sound, fingering and bowing of the passage.
How often should I replace my violin strings?
Shar's rough planning guide is every 6 to 12 months for daily student practice, or every 3 to 6 months for heavier use. Your string maker may recommend shorter intervals, and playing hours, perspiration and string condition matter more than a calendar date. Replace a fraying or unraveling string promptly. If a string will not hold pitch, first consider whether it is new and still settling, or whether the pegs or setup need attention.