
A warm, singing vibrato is one of the sounds that makes the violin so expressive. Students often want to learn it, but a comfortable movement matters more than rushing to produce the effect. The good news is that vibrato is a motion you can build in small, deliberate stages. In this guide, we explain what vibrato is, how to tell when you are ready for it, the three main types, and a simple five-step routine you can follow at home. We also cover the most common problems and how to fix them.
What Is Vibrato and When Are You Ready to Learn It?
Vibrato is a small, regular oscillation of a left-hand finger on the string that makes the pitch waver slightly. Instead of a flat, straight tone, you get a sound with warmth and movement, much like a singer sustaining a note. Good vibrato preserves the identity of an in-tune note. A common learning exercise starts at the intended pitch, rolls slightly below it and returns; this teaching cue is not a rule that describes every performed vibrato waveform.
Teachers introduce vibrato at different stages, once the student can coordinate the motion without losing a comfortable hand position, reliable basic intonation or bow control. There is no fixed grade or year, and preparatory flexibility exercises may begin earlier than sustained vibrato in pieces.
Vibrato takes patient, coordinated practice. The fingertip rolls on its pad while maintaining contact with the string; it should not be pinned rigidly in place. Progress varies: the first comfortable motion may come quickly, while reliable control of speed, width and changes of finger often takes much longer.
Before you start, check these foundations:
- Your left hand holds a relaxed, consistent shape without squeezing the neck.
- You can play first-position notes in tune without constantly adjusting.
- Your instrument feels balanced and secure without a clenched jaw or a squeezing left hand. The left hand may share in supporting the violin while remaining mobile.
If any of these feel shaky, spend a little more time there first. Vibrato built on a tense or unstable hand tends to stay tense.
Understanding the Motion: Arm, Hand and Finger Vibrato
Vibrato comes in three main types, named for the part of the body that drives the motion. Experienced players often combine these movements, but it helps to understand each one on its own.
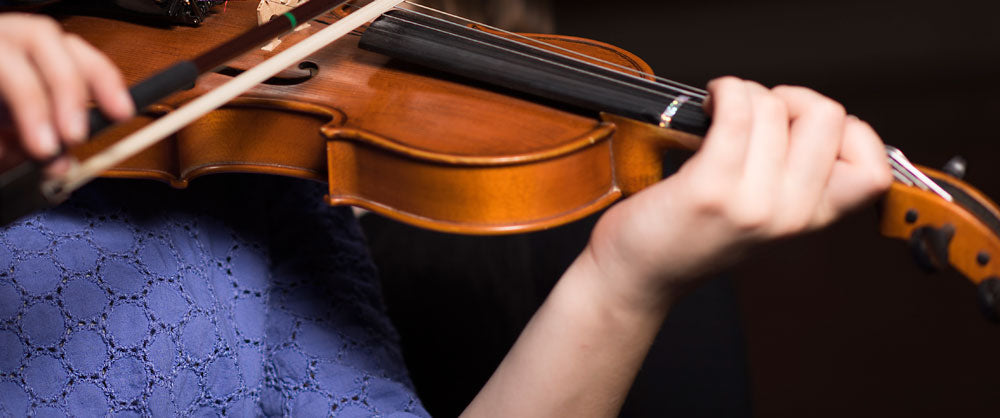
Arm vibrato is led by a small movement of the forearm, with the hand following and the finger joints remaining flexible.
Wrist (hand) vibrato is led mainly by the hand rocking at the wrist. The forearm may move less, but it should not be locked.
Finger vibrato emphasizes small changes at the finger joints. Finger flexibility also contributes to arm and hand vibrato, so the categories overlap.
| Type | Main movement | Practice focus |
|---|---|---|
| Arm | Forearm motion with a responsive hand | Keep the thumb and finger joints free; avoid shaking the instrument |
| Wrist (hand) | Hand rocking at the wrist | Let the fingertip roll without a rigid forearm or collapsed wrist |
| Finger | Small changes at the finger joints | Develop flexibility without squeezing or forcing the joints |
Speed and width can vary within each approach. Arm vibrato is not necessarily slow or wide, and hand vibrato is not restricted to low positions. The musical result depends on coordination, pitch, speed, width and context.
Teachers may start students with hand-led or arm-led exercises. Which one comes first often depends on the teacher and on the student's hand, and many players eventually learn both.
Step-by-Step: A 5-Step Vibrato Practice Routine
This routine moves from a simple motion with no sound to full vibrato on real notes. Use short repetitions with rests, and move on when each motion feels comfortable and controllable. There is no set number of days for each step; a teacher can help select the version that suits your hand.
-
Explore a small motion without the violin. Hold your left hand loosely in playing shape. Gently rock from the wrist, or explore a small forearm movement for arm-led vibrato.
- What you should feel: an easy motion without a clenched thumb or forced range of movement.
-
Check finger flexibility without pressing. Rest a fingertip lightly against the opposite palm. Make a tiny rocking motion that lets the joint nearest the nail soften and return. Do not force the joint straight or backward.
- What you should feel: the pad rolls while the joints remain comfortable. Ask a teacher for an alternative if this exercise causes strain.
-
Move to one stopped note. On a securely balanced violin, place the second or third finger on the A string. Try a very small roll toward the scroll and back to the starting pitch, first silently and then with a slow bow. Keep the pad in contact without sliding to another position.
- What you should feel: a flexible fingertip and light thumb contact. For this exercise, listen for a small dip below the starting note followed by a return.
-
Add a slow pulse. Use a metronome at a comfortable tempo, starting with one complete roll-and-return per click. Try two, then more per beat only when the motion stays relaxed. Keep the tempo slow enough to avoid forcing speed.
- What you should feel: a controllable pulse. Check the starting note without vibrato; a drone can help you hear the return pitch.
-
Add bow and finger changes gradually. Sustain the motion through a short bow, then try a bow change. Later, connect two stopped notes while keeping the hand loose.
- What you should feel: increasingly smooth coordination, without gripping to keep the motion going. Continuous vibrato is an exercise and expressive option, not a requirement for every note.
Common Vibrato Problems and How to Fix Them
These are common issues to watch for as you practice. Slow down and return to an earlier step; persistent problems are easier to assess with a teacher watching your hand and instrument balance.
- A tense hand. If your hand tires quickly or the motion feels stiff, stop and shake it out. Go back to the silent rocking exercise and make the motion smaller and slower until it feels effortless.
- Vibrato that is too fast. A fast, tight vibrato often sounds nervous. Reduce the speed in short metronome exercises and check for a locked wrist, finger joint or thumb. Do not force a larger arm motion just to slow it down.
- Vibrato that is too narrow. If the pitch barely moves, the finger joint may be locked. Explore a slightly wider, slow roll within a comfortable range, then reduce it. Do not stretch the joints to their limits.
- Pitch that creeps sharp. This happens when the finger rolls forward past the note. Start on the correct pitch and roll back toward the scroll, checking the starting and returning note against a drone. Use a tuner to check the plain note rather than chasing every oscillation.
- A thumb that clamps the neck. A squeezing thumb freezes the whole hand. Keep the thumb contact light enough to allow movement. A teacher can check your support points; do not remove needed support or clamp harder with the jaw.
- Vibrato that stops between notes. Many players pause the motion when changing fingers or bows. Practice connecting just two slow stopped notes before trying a full scale. Allow time to coordinate the finger change without tension.
Practice Tips: Making Vibrato Sound Musical
Once the motion feels comfortable, the next goal is making it sound natural rather than mechanical. Start with long notes, such as slow scales or sustained stopped notes, where you have time to listen to the quality of the sound.
Next, bring vibrato into simple pieces and phrases you already know well. Familiar music lets you focus on expression instead of reading notes. Pay attention to where a phrase rises and falls, and let the vibrato follow it.
Vary speed and width independently to explore different colors, then choose what suits the phrase and style. Avoid treating a particular combination as the only way to sound tender, intense or brilliant. Let the bow continue to shape the tone and dynamics.
Finally, remember that you do not need to vibrate every note. Short notes, fast passages, and some quiet moments often sound better with little or no vibrato, and the contrast makes your vibrated notes stand out.
Begin with brief attempts separated by rests. As the motion becomes comfortable, a few minutes spread through your daily practice may be enough; 5 to 10 minutes is not a minimum to push through. Stop if you feel pain or increasing strain, and have your teacher check the movement before continuing.
Set Up Your Violin for Free, Relaxed Vibrato
A free vibrato depends on balance and mobility. The left hand can help support the violin without squeezing it. Avoid trying to clamp the instrument between the jaw and shoulder so that the hand does no supporting work at all. Ask your teacher to check how your collarbone, head and left hand share the support.
A suitable shoulder rest, if you use one, can help the instrument feel balanced. A well-fitting chinrest helps your jaw rest comfortably. Players differ in how they use these supports, so fit and freedom of movement matter more than buying a particular accessory.
While you are building your vibrato, explore Shar Music's practice accessories and materials, from metronomes and tuners to method books, to support every step of your progress.
FAQ
How do you do vibrato on a violin?
Place a left-hand finger on the string and gently roll it back toward the scroll and return to the note, using a relaxed motion from the wrist, arm, or finger. The fingertip rolls on its pad while staying in contact with the string. Starting at the note and rolling slightly below it is a common preparatory exercise, not a reason to press harder.
Is vibrato hard to learn on the violin?
Vibrato takes coordination and patience. Short, comfortable repetitions can help, but progress varies. Stop when the hand tightens and seek feedback rather than repeating a strained motion.
What grade do you learn vibrato on violin?
There is no fixed grade. Teachers consider hand balance, intonation, bow control and the ability to move without squeezing. Preparatory exercises can begin at different stages from using continuous vibrato in a piece.
How long does it take to learn vibrato?
There is no reliable timetable for everyone. Learning a first rocking motion and developing an even, adjustable vibrato are different milestones. Expect gradual progress, with feedback and rest between short practice attempts.
What is the hardest violin technique?
There is no universally hardest violin technique. Vibrato, shifting, double stops and advanced bow strokes pose different challenges to different players. Finger-led vibrato is not automatically the hardest; flexible finger joints matter in every approach.
Why does my vibrato sound shaky or too fast?
A locked thumb, wrist or finger joint can make the motion feel uncontrolled. Return to small, slow repetitions with a metronome and check that the instrument stays balanced. A teacher can help identify the source of tension instead of simply asking you to move the arm more.
Can I learn vibrato without a teacher?
You can explore basic exercises on your own, but teacher feedback is especially useful for checking tension, instrument balance and pitch. Use a tuner to establish the plain note and a drone to listen to pitch returns. Do not continue an exercise that hurts or repeatedly makes you squeeze.