
Learning how to hold a violin bow is one of the first real challenges every new player faces. The bow hold shapes your tone, your control, and how comfortable you feel after a long practice session. The good news is that a solid bow hold isn't about strength or perfect-looking fingers. It's about balance, flexibility, and a few habits you can build in just minutes a day.
How to Hold a Violin Bow: What the Right Grip Should Feel Like
A good bow hold feels less like gripping and more like balancing. Your thumb, index, middle, ring, and pinky fingers work together to form a flexible frame around the bow, one that can bend slightly and spring back as the bow moves. When that frame is working, the bow feels lighter than it actually is, and your arm can focus on moving the bow rather than holding it up.
This matters because nearly every part of your sound runs through the right hand. A balanced bow hold helps you keep the bow straight, control how much weight goes into the string, and change bow direction without a bump or squeak. It also builds confidence. Beginners who trust their bow hold tend to play with a fuller, more committed sound.
If you're in a school orchestra, taking private lessons, or learning in a Suzuki class, you've probably noticed your teacher adjusting your right hand again and again. That isn't about making your hand look pretty. Small changes in thumb or pinky position can be the difference between a steady tone and a scratchy one.
You'll often hear that you should "relax" your bow hand. That advice is right, but it's easy to misread. Relaxed does not mean floppy fingers that let the bow wobble. It means joints that can move, a wrist that can absorb motion, and a palm that isn't stiff. Think of your hand as a suspension system: supportive enough to guide the bow, soft enough to respond to it.
Step-by-Step Beginner Bow Hold: Thumb, Fingers, and Pinky Placement
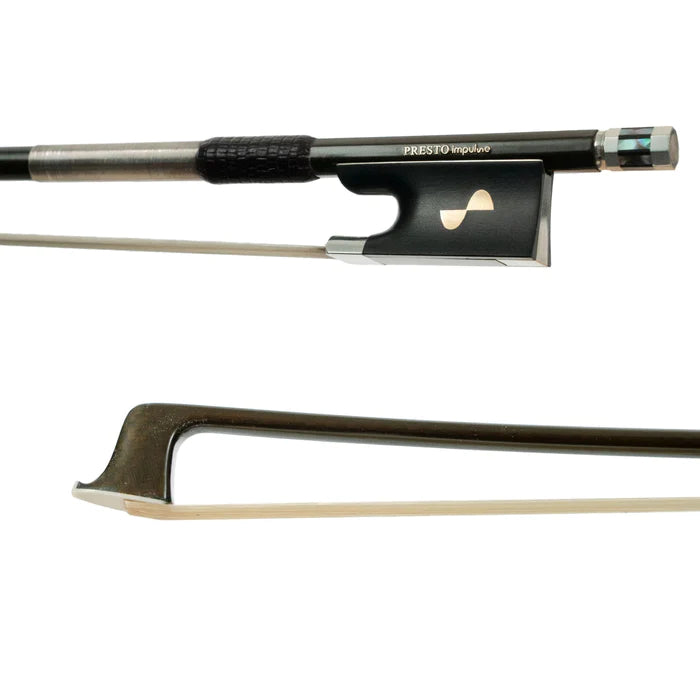
Before you begin, get to know the three main parts of the bow. The frog is the black piece near your hand with the adjustment screw at the end. The stick is the long wooden or carbon fiber shaft. The hair is the ribbon of horsehair that touches the string. To start, hold the bow horizontally in your left hand by the middle of the stick, with the hair facing down and the frog pointing to the right.
Step 1: Place a bent thumb. Curve your right thumb and set its tip where the stick meets the frog, touching both the stick and the edge of the frog. The bend is essential. A bent thumb acts like a spring, while a thumb that locks straight sends tension straight into your wrist and forearm. Avoid pressing the thumb so deep that it pushes into the hair.
Step 2: Drape the middle and ring fingers. Let these two fingers hang over the stick, with the middle finger roughly across from the thumb. Together with the thumb, they form the main support point that the bow balances and pivots around.
Step 3: Rest the index finger. Let your index finger lie naturally on the stick, touching it near the middle joint, with a small space between it and the middle finger. Its job is to transfer arm weight into the string, especially toward the tip, where you need more help producing sound. It rests, it doesn't squeeze.
Step 4: Curve the pinky on top. Place the tip of your pinky on top of the stick, close to the frog, and keep it rounded. The pinky isn't there to press down. It balances the bow near the frog, where the bow's weight sits directly over the string and can easily overwhelm it.
Wrist, Knuckle, and Hand-Shape Alignment for a Relaxed Bow Hold
Once your fingers are in place, look at the bigger picture. Your wrist should stay flexible, neither collapsed down toward the floor nor pushed up high. Your knuckles should stay rounded rather than flat or sharply bent. For a quick reference, let your right arm hang at your side and notice the soft, natural curve of your hand. That's the shape you want to bring to the bow.
Not every hand fits one template, and that's okay. Children and players with small hands can practice the shape with a pencil first, which is lighter and easier to manage. Adult beginners often bring a "gripping a tool" habit from everyday life, so they should consciously use less force than feels natural. Players with very flexible joints may find their thumb or pinky caving inward. For them, the priority is keeping those joints gently bent and supported, even if it takes extra reminders early on.
Left-handed students usually learn the same right-hand bow hold as everyone else. Both hands do skilled work on the violin, and learning the standard setup makes it easier to share stands and play in orchestras.
You may also hear about different bow hold styles. The Franco-Belgian hold places the index finger around the middle joint with a fairly level wrist. The Russian hold sets the index finger deeper on the stick and tilts the hand further toward it, putting more weight into the string. Some teachers also start young students with a simplified beginner hold, sometimes with the thumb temporarily under the frog. Beginners don't need to copy the extreme hand shapes they see from professional players. A comfortable, neutral hold is the best foundation.
Bow Hold Practice Drills Away From the Violin and on the Strings
Getting into the right position once is a start. Being able to find it every time you play is the real goal. Short, focused drills make that happen.
Start away from the violin. Practice the hold on a pencil while watching TV or waiting for dinner. Try finger taps: holding the bow, lift and replace each finger one at a time without losing the shape. Do pinky taps, gently lifting the pinky and setting it back down on the stick while keeping it curved. For the "windshield wiper," hold the bow upright with the tip pointing to the ceiling and slowly tilt it side to side using only your fingers. If the bow feels heavy, support the stick with your left hand while your right hand settles into position.
Then move to the violin. Play long, slow bows on open strings, traveling from frog to tip and back. Pause at the frog, middle, and tip to check that your thumb is still bent and your pinky is still curved. During bow changes, let your fingers stay soft and springy so the direction change sounds smooth.
For kids, games help a lot. The "bunny hand" is a favorite: the middle and ring fingers touch the thumb to form the bunny's mouth, while the index and pinky stick up as ears. "Pinky on guard" reminds students to keep the pinky standing tall on the stick. Many US families practice around five minutes a day, and that's plenty for bow hold work. Frequent, short sessions build the habit faster than one long session per week.
Common Violin Bow Hold Mistakes, Tone Problems, and Quick Fixes
Many bow hold problems show up first as sound or comfort issues. Use this guide to trace a symptom back to its likely cause.
Stiff wrist or tired hand. Likely cause: a locked, straight thumb. Fix: re-bend the thumb and check it every time you pause.
Loss of control near the frog. Likely cause: a collapsed or straight pinky. Fix: curve the pinky and add pinky taps to your daily routine.
Harsh, crunchy sound. Likely cause: the index finger pressing too hard. Fix: lighten the index finger and let natural arm weight and bow speed do the work.
Scratchy tone or rough bow changes. Likely cause: an overall grip that's too tight. Fix: shake out your hand, then play long bows while doing gentle finger taps.
Crooked bow path. Likely cause: a wrist that's too high or collapsed. Fix: practice in front of a mirror and watch the bow stay parallel to the bridge.
In general, a scratchy sound often means too much pressure for the bow speed, while a thin or airy sound usually points to unstable bow speed and weight.
If you're practicing without a teacher, use a mirror or phone video to check yourself:
- Is my thumb bent?
- Is my pinky curved and resting on top of the stick?
- Are my knuckles rounded and my palm soft?
- Does my wrist stay flexible through bow changes?
- Does the bow stay parallel to the bridge?
Finally, remember that the bow itself affects how your hold feels. Hair that's too loose or too tight, not enough rosin, or worn hair that needs replacing can all feel like a bow hold problem to a beginner. Fresh rosin from our violin and viola rosin collection often makes a noticeable difference, and if your bow is past its prime, browse our violin bows for an upgrade.
Take Your Bow Hold to the Next Level
A strong bow hold grows from small, consistent checks. Start by bookmarking the self-check list above and running through it before each practice session. If your thumb or pinky keeps drifting out of place, a bow hold aid can help build muscle memory. Bow Hold Buddies guide the thumb, index finger, and pinky into position, while the Shar PinkyHold focuses on keeping the pinky curved and relaxed. You can explore more options in our teaching aids collection. For a closer look at technique, Bowing Basics walks through the bow hold, wrist movement, and arm weight in detail.
Whether you're a parent, a school orchestra student, or an adult beginner, bring this article's self-check points to your next lesson. Your teacher can confirm whether your hand shape needs adjusting and help you catch subtle thumb, pinky, and wrist issues much faster than practicing alone.
FAQ
Where should my thumb go when holding a violin bow?
Your thumb should be bent, with its tip resting where the stick meets the frog, touching both. Avoid locking the thumb straight or pressing it into the bow hair. A bent thumb acts like a spring that absorbs movement and keeps tension out of your wrist.
Should my pinky be curved or straight on the violin bow?
Curved. The tip of the pinky should rest on top of the stick near the frog, with the joints gently rounded. A curved pinky balances the bow's weight near the frog. A straight or collapsed pinky makes the bow harder to control and often adds tension to the hand.
How tight should I hold a violin bow as a beginner?
Only as tight as you need to keep the bow from slipping. A good test: someone should be able to gently slide the bow out of your hand without a struggle. Your fingers should feel supportive but flexible, never clenched.
What is the easiest way for children or small-handed players to learn the bow hold?
Start with a pencil, which is lighter and easier to manage than a bow. Games like "bunny hand" and "pinky on guard" make the shape memorable. Keep practice short, around five minutes a day, and move to the real bow once the shape feels familiar.
What is the difference between Franco-Belgian and Russian violin bow holds?
In the Franco-Belgian hold, the index finger contacts the stick around the middle joint and the wrist stays fairly level. The Russian hold places the index finger deeper on the stick and tilts the hand further toward it for more weight into the string. Most beginners start with a neutral hold and refine their style with a teacher.
How can I tell if my bow hold is causing poor tone or scratchy sound?
Record yourself on video and check your thumb, pinky, and wrist. A tight grip or a heavy index finger often causes scratchiness, while unstable speed and weight produce a thin sound. Also check your bow: loose hair, low rosin, or worn hair can mimic bow hold problems.
Can left-handed students use the same violin bow hold?
Yes. Most left-handed students learn the standard right-hand bow hold, since both hands do skilled work on the violin. Learning the standard setup also makes it easier to share music stands and play in school or community orchestras.